-
프로젝트 환경설정강의/실전! 스프링 부트와 JPA 활용1 2021. 12. 20. 20:24반응형
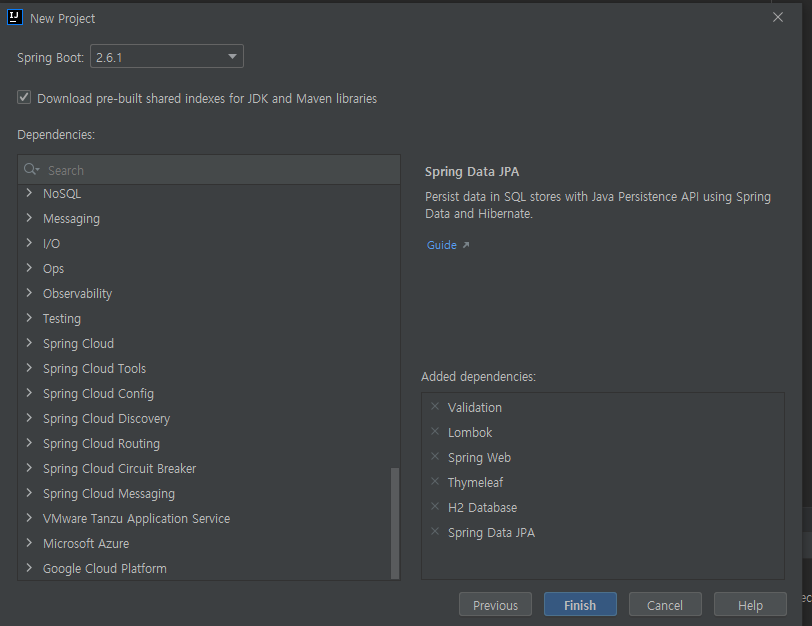
1.spring initializr로 springboot 프로젝트 생성
1-1) jdk11 , Gradle, 패키징 - Jar 선택

2.spring boot 버전 2.6.1 및 dependency 선택 후 프로젝트 생성
생성후 build.gradle에 Junit4 dependency 추가
//JUnit4 추가 (미 추가시 Junit5로 동작)
testImplementation("org.junit.vintage:junit-vintage-engine") {
    exclude group: "org.hamcrest", module: "hamcrest-core"
}
+devtool 추가
developmentOnly 'org.springframework.boot:spring-boot-devtools'3. 롬복 적용하기
3-1) lombok plugin 세팅
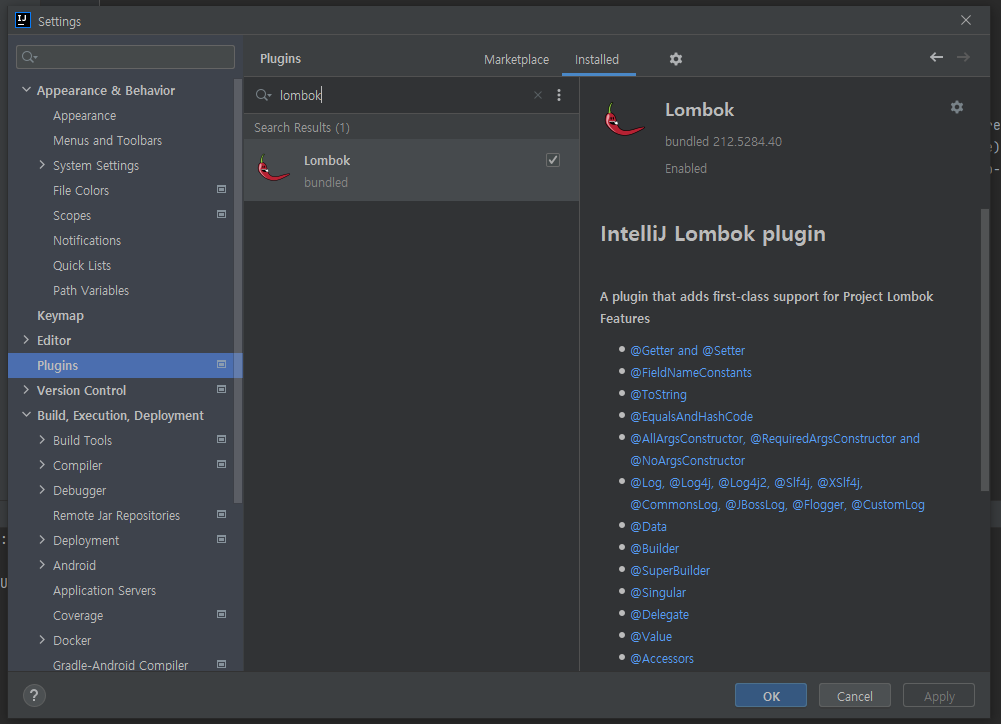
3-2) Enable annotation processing 활성화

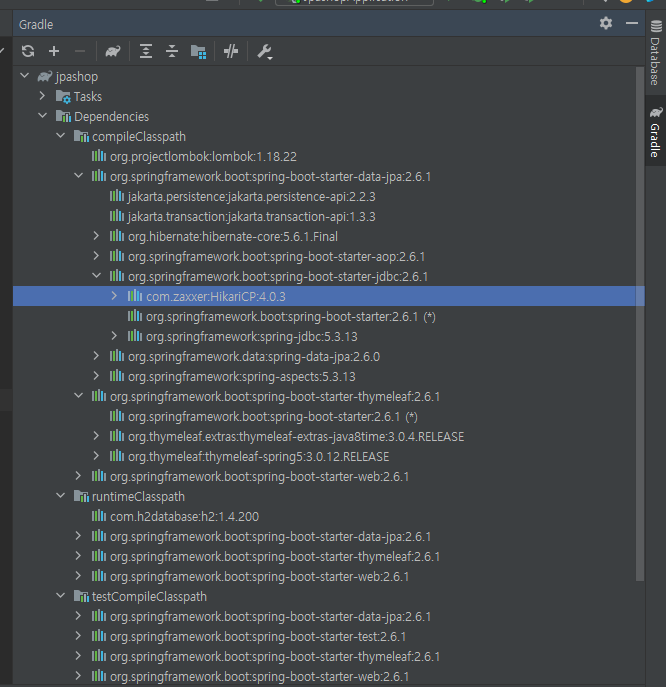
4.프로젝트 library - dependency 확인
4-1)터미널에서 확인
$ ./gradlew dependencies —configuration compileClasspath

4-2)인텔리제이에서 확인
h2버전 과 springboot 버전 충돌할 수도 있음.
스프링 데이터 JPA와 JPA 는 다름.
스프링 데이터 JPA는 JPA를 편리하게 사용하기 위한 모듈.5.타임리프
스프링부트에서 권고하는 템플릿 엔진.
장점
Natural Templates : 기본 markup을 깨지 않고 소스 구현 가능.단점
2점대 버전에서는 <br></br> 태그 를 닫아 주지 않으면 에러, 성능이슈=>3점대에서 개선.스프링부트 타임리프 viewName 매핑

resources/templates/+{viewName}+.html
prefix : templates
surfix : .html서버 사이드 렌더링없이 정적 html은 resources/static 에 파일 위치
6.H2 데이터베이스 설치
테스트 개발용으로 추천.
웹콘솔 지원.
java기반.https://h2database.com/html/main.html
H2 Database Engine
H2 Database Engine Welcome to H2, the Java SQL database. The main features of H2 are: Very fast, open source, JDBC API Embedded and server modes; in-memory databases Browser based Console application Small footprint: around 2.5 MB jar file size Supp
h2database.com
Version 2.0.202 (2021-11-25) 다운로드 후 설치

JDBC URL : jdbc:h2:~/jpashop 로 변경하고 [연결] 시 파일에 DB가 생성.

DB생성 확인 후

JDBC URL : jdbc:h2:tcp://localhost/~/jpashop 로 다시 변경 후 네트워크 모드로 접속
반응형